Monday, May 11, 2015

what is bollinger band indicator?

Bollinger Bands

Introduction

Developed by John Bollinger, Bollinger Bands® are volatility bands placed above and below a moving average. Volatility is based on the standard deviation, which changes as volatility increases and decreases. The bands automatically widen when volatility increases and narrow when volatility decreases. This dynamic nature of Bollinger Bands also means they can be used on different securities with the standard settings. For signals, Bollinger Bands can be used to identify M-Tops and W-Bottoms or to determine the strength of the trend. Signals derived from narrowing BandWidth are discussed in the chart school article on BandWidth.
Note: Bollinger Bands® is a registered trademark of John Bollinger.

SharpCharts Calculation

  * Middle Band = 20-day simple moving average (SMA)
  * Upper Band = 20-day SMA + (20-day standard deviation of price x 2) 
  * Lower Band = 20-day SMA - (20-day standard deviation of price x 2)

Bollinger Bands consist of a middle band with two outer bands. The middle band is a simple moving average that is usually set at 20 periods. A simple moving average is used because the standard deviation formula also uses a simple moving average. The look-back period for the standard deviation is the same as for the simple moving average. The outer bands are usually set 2 standard deviations above and below the middle band.
Bollinger Bands - Chart 1
Settings can be adjusted to suit the characteristics of particular securities or trading styles. Bollinger recommends making small incremental adjustments to the standard deviation multiplier. Changing the number of periods for the moving average also affects the number of periods used to calculate the standard deviation. Therefore, only small adjustments are required for the standard deviation multiplier. An increase in the moving average period would automatically increase the number of periods used to calculate the standard deviation and would also warrant an increase in the standard deviation multiplier. With a 20-day SMA and 20-day Standard Deviation, the standard deviation multiplier is set at 2. Bollinger suggests increasing the standard deviation multiplier to 2.1 for a 50-period SMA and decreasing the standard deviation multiplier to 1.9 for a 10-period SMA.

Signal: W-Bottoms

W-Bottoms were part of Arthur Merrill's work that identified 16 patterns with a basic W shape. Bollinger uses these various W patterns with Bollinger Bands to identify W-Bottoms. A “W-Bottom” forms in a downtrend and involves two reaction lows. In particular, Bollinger looks for W-Bottoms where the second low is lower than the first, but holds above the lower band. There are four steps to confirm a W-Bottom with Bollinger Bands. First, a reaction low forms. This low is usually, but not always, below the lower band. Second, there is a bounce towards the middle band. Third, there is a new price low in the security. This low holds above the lower band. The ability to hold above the lower band on the test shows less weakness on the last decline. Fourth, the pattern is confirmed with a strong move off the second low and a resistance break.
Bollinger Bands - Chart 2
Chart 2 shows Nordstrom (JWN) with a W-Bottom in January-February 2010. First, the stock formed a reaction low in January (black arrow) and broke below the lower band. Second, there was a bounce back above the middle band. Third, the stock moved below its January low and held above the lower band. Even though the 5-Feb spike low broke the lower band, Bollinger Bands are calculated using closing prices so signals should also be based on closing prices. Fourth, the stock surged with expanding volume in late February and broke above the early February high. Chart 3 shows Sandisk with a smaller W-Bottom in July-August 2009.
Bollinger Bands - Chart 3

Signal: M-Tops

M-Tops were also part of Arthur Merrill's work that identified 16 patterns with a basic M shape. Bollinger uses these various M patterns with Bollinger Bands to identify M Bottoms. According to Bollinger, tops are usually more complicated and drawn out than bottoms. Double tops, head-and-shoulders patterns and diamonds represent evolving tops.
In its most basic form, an M-Top is similar to a double top. However, the reaction highs are not always equal. The first high can be higher or lower than the second high. Bollinger suggests looking for signs of non-confirmation when a security is making new highs. This is basically the opposite of the W-Bottom. A non-confirmation occurs with three steps. First, a security forges a reaction high above the upper band. Second, there is a pullback towards the middle band. Third, prices move above the prior high, but fail to reach the upper band. This is a warning sign. The inability of the second reaction high to reach the upper band shows waning momentum, which can foreshadow a trend reversal. Final confirmation comes with a support break or bearish indicator signal.
Bollinger Bands - Chart 4
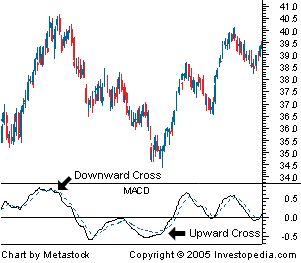
Chart 4 shows Exxon Mobil (XOM) with an M-Top in April-May 2008. The stock moved above the upper band in April. There was a pullback in May and then another push above 90. Even though the stock moved above the upper band on an intraday basis, it did not CLOSE above the upper band. The M-Top was confirmed with a support break two weeks later. Also notice that MACD formed a bearish divergence and moved below its signal line for confirmation.
Bollinger Bands - Chart 5
Chart 5 shows Pulte Homes (PHM) within an uptrend in July-August 2008. Price exceeded the upper band in early September to affirm the uptrend. After a pullback below the 20-day SMA (middle Bollinger Band), the stock moved to a higher high above 17. Despite this new high for the move, price did not exceed the upper band. This flashed a warning sign. The stock broke support a week later and MACD moved below its signal line. Notice that this M-top is more complex because there are lower reaction highs on either side of the peak (blue arrow). This evolving top formed a small head-and-shoulders pattern.

Signal: Walking the Bands

Moves above or below the bands are not signals per se. As Bollinger puts it, moves that touch or exceed the bands are not signals, but rather “tags”. On the face of it, a move to the upper band shows strength, while a sharp move to the lower band shows weakness. Momentum oscillators work much the same way. Overbought is not necessarily bullish. It takes strength to reach overbought levels and overbought conditions can extend in a strong uptrend. Similarly, prices can “walk the band” with numerous touches during a strong uptrend. Think about it for a moment. The upper band is 2 standard deviations above the 20-period simple moving average. It takes a pretty strong price move to exceed this upper band. An upper band touch that occurs after a Bollinger Band confirmed W-Bottom would signal the start of an uptrend. Just as a strong uptrend produces numerous upper band tags, it is also common for prices to never reach the lower band during an uptrend. The 20-day SMA sometimes acts as support. In fact, dips below the 20-day SMA sometimes provide buying opportunities before the next tag of the upper band.
Bollinger Bands - Chart 6
Chart 6 shows Air Products (APD) with a surge and close above the upper band in mid July. First, notice that this is a strong surge that broke above two resistance levels. A strong upward thrust is a sign of strength, not weakness. Trading turned flat in August and the 20-day SMA moved sideways. The Bollinger Bands narrowed, but APD did not close below the lower band. Prices, and the 20-day SMA, turned up in September. Overall, APD closed above the upper band at least five times over a four month period. The indicator window shows the 10-period Commodity Channel Index (CCI). Dips below -100 are deemed oversold and moves back above -100 signal the start of an oversold bounce (green dotted line). The upper band tag and breakout started the uptrend. CCI then identified tradable pullbacks with dips below -100. This is an example of combining Bollinger Bands with a momentum oscillator for trading signals.
Bollinger Bands - Chart 7
Chart 7 shows Monsanto (MON) with a walk down the lower band. The stock broke down in January with a support break and closed below the lower band. From mid January until early May, Monsanto closed below the lower band at least five times. Notice that the stock did not close above the upper band once during this period. The support break and initial close below the lower band signaled a downtrend. As such, the 10-period Commodity Channel Index (CCI) was used to identify short-term overbought situations. A move above +100 is overbought. A move back below +100 signals a resumption of the downtrend (red arrows). This system triggered two good signals in early 2010.

Conclusions

Bollinger Bands reflect direction with the 20-period SMA and volatility with the upper/lower bands. As such, they can be used to determine if prices are relatively high or low. According to Bollinger, the bands should contain 88-89% of price action, which makes a move outside the bands significant. Technically, prices are relatively high when above the upper band and relatively low when below the lower band. However, relatively high should not be regarded as bearish or as a sell signal. Likewise, relatively low should not be considered bullish or as a buy signal. Prices are high or low for a reason. As with other indicators, Bollinger Bands are not meant to be used as a stand alone tool. Chartists should combine Bollinger Bands with basic trend analysis and other indicators for confirmation.

Bands and SharpCharts

Bollinger Bands can be found in SharpCharts as a price overlay. As with a simple moving average, Bollinger Bands should be shown on top of a price plot. Upon selecting Bollinger Bands, the default setting will appear in the parameters window (20,2). The first number (20) sets the periods for the simple moving average and the standard deviation. The second number (2) sets the standard deviation multiplier for the upper and lower bands. These default parameters set the bands 2 standard deviations above/below the simple moving average. Users can change the parameters to suit their charting needs. Bollinger Bands (50,2.1) can be used for a longer timeframe or Bollinger Bands (10,1.9) can be used for a shorter timeframe.

Many people lose in forex, it is estimated that over 95% of traders therefore vanguard system are forex robot, for years I have researched and developed a unique strategy in forex trading, a strategy used by banks, mutual funds and other institutions worldwide, and is now at your fingertips is the high frequency trading


                           CUSTOMERS’TESTIMONIALS AND WITHDRAWALS


CONTACT US


What is the indicator ATR?

Average True Range (ATR)

Introduction

Developed by J. Welles Wilder, the Average True Range (ATR) is an indicator that measures volatility. As with most of his indicators, Wilder designed ATR with commodities and daily prices in mind. Commodities are frequently more volatile than stocks. They were are often subject to gaps and limit moves, which occur when a commodity opens up or down its maximum allowed move for the session. A volatility formula based only on the high-low range would fail to capture volatility from gap or limit moves. Wilder created Average True Range to capture this “missing” volatility. It is important to remember that ATR does not provide an indication of price direction, just volatility.
Wilder features ATR in his 1978 book, New Concepts in Technical Trading Systems. This book also includes the Parabolic SAR, RSI and the Directional Movement Concept (ADX). Despite being developed before the computer age, Wilder's indicators have stood the test of time and remain extremely popular.

True Range

Wilder started with a concept called True Range (TR), which is defined as the greatest of the following:
  • Method 1: Current High less the current Low
  • Method 2: Current High less the previous Close (absolute value)
  • Method 3: Current Low less the previous Close (absolute value)
Absolute values are used to ensure positive numbers. After all, Wilder was interested in measuring the distance between two points, not the direction. If the current period's high is above the prior period's high and the low is below the prior period's low, then the current period's high-low range will be used as the True Range. This is an outside day that would use Method 1 to calculate the TR. This is pretty straight forward. Methods 2 and 3 are used when there is a gap or an inside day. A gap occurs when the previous close is greater than the current high (signaling a potential gap down or limit move) or the previous close is lower than the current low (signaling a potential gap up or limit move). The image below shows examples of when methods 2 and 3 are appropriate.
ATR - True Range Image
Example A: A small high/low range formed after a gap up. The TR equals the absolute value of the difference between the current high and the previous close.
Example B: A small high/low range formed after a gap down. The TR equals the absolute value of the difference between the current low and the previous close.
Example C: Even though the current close is within the previous high/low range, the current high/low range is quite small. In fact, it is smaller than the absolute value of the difference between the current high and the previous close, which is used to value the TR.

Calculation


Typically, the Average True Range (ATR) is based on 14 periods and can be calculated on an intraday, daily, weekly or monthly basis. For this example, the ATR will be based on daily data. Because there must be a beginning, the first TR value is simply the High minus the Low, and the first 14-day ATR is the average of the daily TR values for the last 14 days. After that, Wilder sought to smooth the data by incorporating the previous period's ATR value.

               
Current ATR = [(Prior ATR x 13) + Current TR] / 14

  - Multiply the previous 14-day ATR by 13.
  - Add the most recent day's TR value.
  - Divide the total by 14
In the spreadsheet example, the first True Range value (.91) equals the High minus the Low (yellow cells). The first 14-day ATR value (.56)) was calculated by finding the average of the first 14 True Range values (blue cell). Subsequent ATR values were smoothed using the formula above. The spreadsheet values correspond with the yellow area on the chart below. Notice how ATR surged as QQQQ plunged in May with many long candlesticks.
ATR - Chart 1
For those trying this at home, a few caveats apply. First, ATR values depend on where you begin. The first True Range value is simply the current High minus the current Low and the first ATR is an average of the first 14 True Range values. The real ATR formula does not kick in until day 15. Even so, the remnants of these first two calculations linger to slightly affect ATR values. Spreadsheet values for a small subset of data may not match exactly with what is seen on the price chart. Decimal rounding can also slightly affect ATR values.

Absolute ATR

ATR is based on the True Range, which uses absolute price changes. As such, ATR reflects volatility as absolute level. In other words, ATR is not shown as a percentage of the current close. This means low priced stocks will have lower ATR values than high price stocks. For example, a $20-30 security will have much lower ATR values than a $200-300 security. Because of this, ATR values are not comparable. Even large price movements for a single security, such as a decline from 70 to 20, can make long-term ATR comparisons impractical. Chart 4 shows Google with double digit ATR values and chart 5 shows Microsoft with ATR values below 1. Despite different values, their ATR lines have similar shapes.

Conclusions

ATR is not a directional indicator, such as MACD or RSI. Instead, ATR is a unique volatility indicator that reflects the degree of interest or disinterest in a move. Strong moves, in either direction, are often accompanied by large ranges, or large True Ranges. This is especially true at the beginning of a move. Uninspiring moves can be accompanied by relatively narrow ranges. As such, ATR can be used to validate the enthusiasm behind a move or breakout. A bullish reversal with an increase in ATR would show strong buying pressure and reinforce the reversal. A bearish support break with an increase in ATR would show strong selling pressure and reinforce the support break.

SharpCharts

Listed as “Average True Range”, ATR is on the Indicators drop-down menu. The “parameters” box to the right of the indicator contains the default value, 14, for the number of periods used to smooth the data. To adjust the period setting, highlight the default value and enter a new setting. Wilder often used 8 period ATR. SharpCharts also allows users to position the indicator above, below, or behind the price plot. A moving average can be added to identify upturns or downturns in ATR. Click “advanced options” to add a moving average as an indicator overlay. Click here for a live example of ATR.
ATR - SharpCharts

Many people lose in forex, it is estimated that over 95% of traders therefore vanguard system are forex robot, for years I have researched and developed a unique strategy in forex trading, a strategy used by banks, mutual funds and other institutions worldwide, and is now at your fingertips is the high frequency trading


                             CUSTOMERS’TESTIMONIALS AND WITHDRAWALS


CONTACT US


What is stocastic indicator?

Stochastic Oscillator

Introduction

Developed by George C. Lane in the late 1950s, the Stochastic Oscillator is a momentum indicator that shows the location of the close relative to the high-low range over a set number of periods. According to an interview with Lane, the Stochastic Oscillator “doesn't follow price, it doesn't follow volume or anything like that. It follows the speed or the momentum of price. As a rule, the momentum changes direction before price.” As such, bullish and bearish divergences in the Stochastic Oscillator can be used to foreshadow reversals. This was the first, and most important, signal that Lane identified. Lane also used this oscillator to identify bull and bear set-ups to anticipate a future reversal. Because the Stochastic Oscillator is range bound, is also useful for identifying overbought and oversold levels.

Calculation

%K = (Current Close - Lowest Low)/(Highest High - Lowest Low) * 100
%D = 3-day SMA of %K

Lowest Low = lowest low for the look-back period
Highest High = highest high for the look-back period
%K is multiplied by 100 to move the decimal point two places

The default setting for the Stochastic Oscillator is 14 periods, which can be days, weeks, months or an intraday timeframe. A 14-period %K would use the most recent close, the highest high over the last 14 periods and the lowest low over the last 14 periods. %D is a 3-day simple moving average of %K. This line is plotted alongside %K to act as a signal or trigger line.
Stochastics - Spreadsheet 1
Stochastics - Chart 1

Interpretation

The Stochastic Oscillator measures the level of the close relative to the high-low range over a given period of time. Assume that the highest high equals 110, the lowest low equals 100 and the close equals 108. The high-low range is 10, which is the denominator in the %K formula. The close less the lowest low equals 8, which is the numerator. 8 divided by 10 equals .80 or 80%. Multiply this number by 100 to find %K %K would equal 30 if the close was at 103 (.30 x 100). The Stochastic Oscillator is above 50 when the close is in the upper half of the range and below 50 when the close is in the lower half. Low readings (below 20) indicate that price is near its low for the given time period. High readings (above 80) indicate that price is near its high for the given time period. The IBM example above shows three 14-day ranges (yellow areas) with the closing price at the end of the period (red dotted) line. The Stochastic Oscillator equals 91 when the close was at the top of the range. The Stochastic Oscillator equals 15 when the close was near the bottom of the range. The close equals 57 when the close was in the middle of the range.

Fast, Slow or Full

There are three versions of the Stochastic Oscillator available on SharpCharts. The Fast Stochastic Oscillator is based on George Lane's original formulas for %K and %D. %K in the fast version that appears rather choppy. %D is the 3-day SMA of %K. In fact, Lane used %D to generate buy or sell signals based on bullish and bearish divergences. Lane asserts that a %D divergence is the “only signal which will cause you to buy or sell.” Because %D in the Fast Stochastic Oscillator is used for signals, the Slow Stochastic Oscillator was introduced to reflect this emphasis. The Slow Stochastic Oscillator smooths %K with a 3-day SMA, which is exactly what %D is in the Fast Stochastic Oscillator. Notice that %K in the Slow Stochastic Oscillator equals %D in the Fast Stochastic Oscillator (chart 2).
Stochastics - Chart 2
Fast Stochastic Oscillator:
  • Fast %K = %K basic calculation
  • Fast %D = 3-period SMA of Fast %K
Slow Stochastic Oscillator:
  • Slow %K = Fast %K smoothed with 3-period SMA
  • Slow %D = 3-period SMA of Slow %K
The Full Stochastic Oscillator is a fully customizable version of the Slow Stochastic Oscillator. Users can set the look-back period, the number of periods to slow %K and the number of periods for the %D moving average. The default parameters were used in these examples: Fast Stochastic Oscillator (14,3), Slow Stochastic Oscillator (14,3) and Full Stochastic Oscillator (14,3,3).
Full Stochastic Oscillator:
  • Full %K = Fast %K smoothed with X-period SMA
  • Full %D = X-period SMA of Full %K

Overbought Oversold

As a bound oscillator, the Stochastic Oscillator makes it easy to identify overbought and oversold levels. The oscillator ranges from zero to one hundred. No matter how fast a security advances or declines, the Stochastic Oscillator will always fluctuate within this range. Traditional settings use 80 as the overbought threshold and 20 as the oversold threshold. These levels can be adjusted to suit analytical needs and security characteristics. Readings above 80 for the 20-day Stochastic Oscillator would indicate that the underlying security was trading near the top of its 20-day high-low range. Readings below 20 occur when a security is trading at the low end of its high-low range.
Before looking at some chart examples, it is important to note that overbought readings are not necessarily bearish. Securities can become overbought and remain overbought during a strong uptrend. Closing levels that are consistently near the top of the range indicate sustained buying pressure. In a similar vein, oversold readings are not necessarily bullish. Securities can also become oversold and remain oversold during a strong downtrend. Closing levels consistently near the bottom of the range indicate sustained selling pressure. It is, therefore, important to identify the bigger trend and trade in the direction of this trend. Look for occasional oversold readings in an uptrend and ignore frequent overbought readings. Similarly, look for occasional overbought readings in a strong downtrend and ignore frequent oversold readings.
Chart 3 shows Yahoo! (YHOO) with the Full Stochastic Oscillator (20,5,5). A longer look-back period (20 days versus 14) and longer moving averages for smoothing (5 versus 3) produce a less sensitive oscillator with fewer signals. Yahoo was trading between 14 and 18 from July 2009 until April 2010. Such trading ranges are well suited for the Stochastic Oscillator. Dips below 20 warn of oversold conditions that could foreshadow a bounce. Moves above 80 warn of overbought conditions that could foreshadow a decline. Notice how the oscillator can move above 80 and remain above 80 (orange highlights). Similarly, the oscillator moved below 20 and sometimes remained below 20. The indicator is both overbought AND strong when above 80. A subsequent move below 80 is needed to signal some sort of reversal or failure at resistance (red dotted lines). Conversely, the oscillator is both oversold and weak when below 20. A move above 20 is needed to show an actual upturn and successful support test (green dotted lines).
Stochastics - Chart 3
Chart 4 shows Crown Castle (CCI) with a breakout in July to start an uptrend. The Full Stochastic Oscillator (20,5,5) was used to identify oversold readings. Overbought readings were ignored because the bigger trend was up. Trading in the direction of the bigger trend improves the odds. The Full Stochastic Oscillator moved below 20 in early September and early November. Subsequent moves back above 20 signaled an upturn in prices (green dotted line) and continuation of the bigger uptrend.
Stochastics - Chart 4
Chart 5 shows Autozone (AZO) with a support break in May 2009 that started a downtrend. With a downtrend in force, the Full Stochastic Oscillator (10,3,3) was used to identify overbought readings to foreshadow a potential reversal. Oversold readings were ignored because of the bigger downtrend. The shorter look-back period (10 versus 14) increases the sensitivity of the oscillator for more overbought readings. For reference, the Full Stochastic Oscillator (20,5,5) is also shown. Notice that this less sensitive version did not become overbought in August, September and October. It is sometimes necessary to increase sensitivity to generate signals.
Stochastics - Chart 5

Bull Bear Divergences

Divergences form when a new high or low in price is not confirmed by the Stochastic Oscillator. A bullish divergence forms when price records a lower low, but the Stochastic Oscillator forms a higher low. This shows less downside momentum that could foreshadow a bullish reversal. A bearish divergence forms when price records a higher high, but the Stochastic Oscillator forms a lower high. This shows less upside momentum that could foreshadow a bearish reversal. Once a divergence takes hold, chartists should look for a confirmation to signal an actual reversal. A bearish divergence can be confirmed with a support break on the price chart or a Stochastic Oscillator break below 50, which is the centerline. A bullish divergence can be confirmed with a resistance break on the price chart or a Stochastic Oscillator break above 50.
50 is an important level to watch. The Stochastic Oscillator moves between zero and one hundred, which makes 50 the centerline. Think of it as the 50 yard line in football. The offense has a higher chance of scoring when it crosses the 50 yard line. The defense has an edge as long as it prevents the offense from crossing the 50 yard line. A Stochastic Oscillator cross above 50 signals that prices are trading in the upper half of their high-low range for the given look-back period. This suggests that the cup is half full. Conversely, a cross below 50 means prices are trading in the bottom half of the given look-back period. This suggests that the cup is half empty.
Chart 6 shows International Gaming Tech (IGT) with a bullish divergence in February-March 2010. Notice how the stock moved to a new low, but the Stochastic Oscillator formed a higher low. There are three steps to confirming this higher low. The first is a signal line cross and/or move back above 20. A signal line cross occurs when %K (black) crosses %D (red). This provides the earliest entry possible. The second is a move above 50, which puts prices in the upper half of the Stochastic range. The third is a resistance breakout on the price chart. Notice how the Stochastic Oscillator moved above 50 in late March and remained above 50 until late May.
Stochastics - Chart 6
Chart 7 shows Kohls (KSS) with a bearish divergence in April 2010. The stock moved to higher highs in early and late April, but the Stochastic Oscillator peaked in late March and formed lower highs. The signal line crosses and moves below 80 did not provide good early signals in this case because KSS kept moving higher. The Stochastic Oscillator moved below 50 for the second signal and the stock broke support for the third signal. As KSS shows, early signals are not always clean and simple. Signal line crosses, moves below 80 and moves above 20 are frequent and prone to whipsaw. Even after KSS broke support and the Stochastic Oscillator moved below 50, the stock bounced back above 57 and the Stochastic Oscillator bounced back above 50 before the stock continued sharply lower.
Stochastics - Chart 7

Bull Bear Set-ups

George Lane identified another form of divergence to predict bottoms or tops. A bull set-up is basically the inverse of a bullish divergence. The underlying security forms a lower high, but the Stochastic Oscillator forms a higher high. Even though the stock could not exceed its prior high, the higher high in the Stochastic Oscillator shows strengthening upside momentum. The next decline is then expected to result in a tradable bottom. Chart 8 shows Network Appliance (NTAP) with a bull set-up in June 2009. The stock formed a lower high as the Stochastic Oscillator forged a higher high. This higher high shows strength in upside momentum. Remember that this is a set-up, not a signal. The set-up foreshadows a tradable low in the near future. NTAP declined below its June low and the Stochastic Oscillator moved below 20 to become oversold. Traders could have acted when the Stochastic Oscillator moved above its signal line, above 20 or above 50. Alternatively, NTAP subsequently broke resistance with a strong move.
Stochastics - Chart 8
A bear set-up occurs when the security forms a higher low, but the Stochastic Oscillator forms a lower low. Even though the stock held above its prior low, the lower low in the Stochastic Oscillator shows increasing downside momentum. The next advance is expected to result in an important peak. Chart 9 shows Motorola (MOT) with a bear set-up in November 2009. The stock formed a higher low in late-November and early December, but the Stochastic Oscillator formed a lower low with a move below 20. This showed strong downside momentum. The subsequent bounce did not last long as the stock quickly peaked. Notice that the Stochastic Oscillator did not make it back above 80 and turned down below its signal line in mid December.
Stochastics - Chart 9

Conclusions

While momentum oscillators are best suited for trading ranges, they can also be used with securities that trend, provided the trend takes on a zigzag format. Pullbacks are part of uptrends that zigzag higher. Bounces are part of downtrends that zigzag lower. In this regard, the Stochastic Oscillator can be used to identify opportunities in harmony with the bigger trend.
The indicator can also be used to identify turns near support or resistance. Should a security trade near support with an oversold Stochastic Oscillator, look for a break above 20 to signal an upturn and successful support test. Conversely, should a security trade near resistance with an overbought Stochastic Oscillator, look for a break below 80 to signal a downturn and resistance failure.
The settings on the Stochastic Oscillator depend on personal preferences, trading style and timeframe. A shorter look-back period will produce a choppy oscillator with many overbought and oversold readings. A longer look-back period will provide a smoother oscillator with fewer overbought and oversold readings.
Like all technical indicators, it is important to use the Stochastic Oscillator in conjunction with other technical analysis tools. Volume, support/resistance and breakouts can be used to confirm or refute signals produced by the Stochastic Oscillator.

Using with SharpCharts

As noted above, there are three versions of the Stochastic Oscillator available as an indicator on SharpCharts. The default settings are as follows: Fast Stochastic Oscillator (14,3), Slow Stochastic Oscillator (14,3) and Full Stochastic Oscillator (14,3,3). The look-back period (14) is used for the basic %K calculation. Remember, %K in the Fast Stochastic Oscillator is unsmoothed and %K in the Slow Stochastic Oscillator is smoothed with a 3-day SMA. The “3” in the Fast and Slow Stochastic Oscillator settings (14,3) sets the moving average period for %D. Chartists looking for maximum flexibility can simply choose the Full Stochastic Oscillator to set the look-back period, the smoothing factor for %K and the moving average for %D. The indicator can be placed above, below or behind the actual price plot. Placing the Stochastic Oscillator behind the price allows users to easily match indicator swings with price swings. Click here for a live example.
Stochastics - Chart 10
Stochastics - SharpCharts

Suggested Scans

Stochastic Oscillator Oversold Upturn: This scan starts with stocks that are trading above their 200-day moving average to focus on those in a bigger uptrend. Of these, the scan then looks for stocks with a Stochastic Oscillator that turned up from an oversold level (below 20).
Stochastic Oscillator Overbought Downturn: This scan starts with stocks that are trading below their 200-day moving average to focus on those in a bigger downtrend. Of these, the scan then looks for stocks with a Stochastic Oscillator that turned down after an overbought reading (above 80).

Further Study

Murphy's book has a chapter devoted to momentum oscillators and their various uses. Murphy covers the pros and cons as well as some examples specific to the Stochastic Oscillator.
Pring's book shows the basics of momentum indicators by covering divergences, crossovers and other signals. There are two more chapters covering specific momentum indicators with plenty of examples.

Many people lose in forex, it is estimated that over 95% of traders therefore vanguard system are forex robot, for years I have researched and developed a unique strategy in forex trading, a strategy used by banks, mutual funds and other institutions worldwide, and is now at your fingertips is the high frequency trading


                             CUSTOMERS’TESTIMONIALS AND WITHDRAWALS


CONTACT US


Wednesday, May 6, 2015

Moving Average Convergence Divergence - MACD

DEFINITION OF 'MOVING AVERAGE CONVERGENCE DIVERGENCE - MACD'

A trend-following momentum indicator that shows the relationship between two moving averages of prices. The MACD is calculated by subtracting the 26-day exponential moving average (EMA) from the 12-day EMA. A nine-day EMA of the MACD, called the "signal line", is then plotted on top of the MACD, functioning as a trigger for buy and sell signals.


There are three common methods used to interpret the MACD:
1. Crossovers - As shown in the chart above, when the MACD falls below the signal line, it is a bearish signal, which indicates that it may be time to sell. Conversely, when the MACD rises above the signal line, the indicator gives a bullish signal, which suggests that the price of the asset is likely to experience upward momentum. Many traders wait for a confirmed cross above the signal line before entering into a position to avoid getting getting "faked out" or entering into a position too early, as shown by the first arrow.
2. Divergence - When the security price diverges from the MACD. It signals the end of the current trend.
3. Dramatic rise - When the MACD rises dramatically - that is, the shorter moving average pulls away from the longer-term moving average - it is a signal that the security is overbought and will soon return to normal levels.
Traders also watch for a move above or below the zero line because this signals the position of the short-term average relative to the long-term average. When the MACD is above zero, the short-term average is above the long-term average, which signals upward momentum. The opposite is true when the MACD is below zero. As you can see from the chart above, the zero line often acts as an area of support and resistance for the indicator.
Are you interested in using the MACD for your trades? Check out our own Primer On The MACD and Spotting Trend Reversals With MACD for more information!

Many people lose in forex, it is estimated that over 95% of traders therefore vanguard system are forex robot, for years I have researched and developed a unique strategy in forex trading, a strategy used by banks, mutual funds and other institutions worldwide, and is now at your fingertips is the high frequency trading


                       CUSTOMERS’TESTIMONIALS AND WITHDRAWALS


CONTACT US